用InceptionV3迁移学习进行客流检测

项目背景

  • 很久以前自学过深度学习框架TensorFlow学习与应用,并且实现里面的大部分代码,其中就包括有Google深度学习模型Inception v3,Incetption模型是谷歌基于开源项目Tensorflow的一款深度学习模型,能够识别千种以上的对象,并且进行过优化,适合迁移学习使用
  • 刚刚给公司新买的GPU配置好Anaconda+Tensorflow_gpu环境
  • 学校《图像处理》课程结束大作业就是公交车上的行人检测,要求统计实时乘客流量并且款选出每个人,越准确越好

result.jpg

下载Inception v3

Inception v3模型已经在项目背景给出,下载后存盘,我的路径是

1
E:\Python\测试下载\tensorflow\inception_model

你只要存到你想要放置的位置就好,因为后面调用的时候会设置路径。文件夹里面是
Inception v3
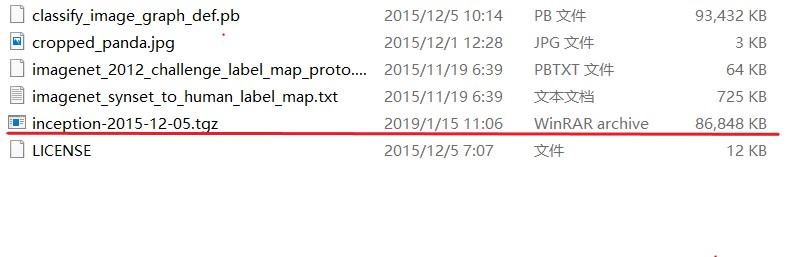
迁移学习训练时候主要调用的就是这个tgz压缩包。

使用数据集VGG

进入VGG数据集,下载几个分类的图片,我个人下载了flower, airplane, guitars, animal and motorbikes,每个分类保存大概500张左右用于训练。里面图片类似这种


flower


guitar

好了,现在我们有五个分类的文件夹,每个里面大概存有500张图片。

现在我们进行训练,参考项目背景中的视频,编写批处理文件retrain.bat,文件内容如下:

1
2
3
4
5
6
7
8
python E:/Python/测试下载/tensorflow/retrain.py ^
--bottleneck_dir bottleneck ^
--how_many_training_steps 40 ^
--model_dir E:/Python/测试下载/tensorflow/inception_model/ ^
--output_graph output_graph.pb ^
--output_labels output_labels.txt ^
--image_dir data/train/
pause

第一行表示一个Python文件的存放位置,通过调用重新训练模型,文件内容太长就不贴了,地址在
第二行表示Inception v3的输出瓶颈位置,需要我们在批处理文件的目录下新建bottleneck文件夹,用于存放训练产生数据;
第三行表示训练次数,由你喜欢,可以来个一两百次,比较GPU无压力,我之前用cpu跑贼慢,跑完系统还崩了,然后模型测试结果也不对,不过神奇的是过了一天什么也没干过,结果用预测对了,简直玄学;
第四行表示之前下载的Inception v3的位置,给我们调用;
第五,六行表示将结果保存到批处理文件的目录下,是两个文件.pb和.txt,分别存放模型和标签;
第七行表示我们下载好的VGG图片,分为五类在五个文件夹内,文件夹名字均小写,且图片格式均为.bmp,否则会训练失败,这五个文件夹就保存在data/train/文件夹里面,data和train文件夹均是我们新建的,data文件夹存放在批处理文件目录下。
然后我们开始跑程序吧,点击retrain.bat然后等待几分钟,结果就是,嘣……

训练结果测试

不用贴图,训练成功你一定是看得出来的。直接从之前五类图片里面挑几个非训练图片出来用于测试,代码贴上来:

1
2
3
4
5
6
7
8
9
10
11
12
13
14
15
16
17
18
19
20
21
22
23
24
25
26
27
28
29
30
31
32
33
34
35
36
37
38
39
40
41
42
43
44
45
46
47
48
49
50
51
52
53
54
import tensorflow as tf
import os
import numpy as np
import re
from PIL import Image
import matplotlib.pyplot as plt

lines = tf.gfile.GFile('retrain/output_labels.txt').readlines()
uid_to_human = {}
#一行一行读取数据
for uid,line in enumerate(lines) :
#去掉换行符
line=line.strip('\n')
uid_to_human[uid] = line

def id_to_string(node_id):
if node_id not in uid_to_human:
return ''
return uid_to_human[node_id]

with tf.gfile.FastGFile('retrain/output_graph.pb', 'rb') as f:
graph_def = tf.GraphDef()
graph_def.ParseFromString(f.read())
tf.import_graph_def(graph_def, name='')

with tf.Session() as sess:
softmax_tensor = sess.graph.get_tensor_by_name('final_result:0')
#遍历目录
for root,dirs,files in os.walk('retrain/images/'):
for file in files:
#载入图片
image_data = tf.gfile.FastGFile(os.path.join(root,file), 'rb').read()
predictions = sess.run(softmax_tensor,{'DecodeJpeg/contents:0': image_data})#图片格式是jpg格式
predictions = np.squeeze(predictions)#把结果转为1维数据

#打印图片路径及名称
image_path = os.path.join(root,file)
print(image_path)
#显示图片
img=Image.open(image_path)
plt.imshow(img)
plt.axis('off')
plt.show()

#排序
top_k = predictions.argsort()[::-1]
print(top_k)
for node_id in top_k:
#获取分类名称
human_string = id_to_string(node_id)
#获取该分类的置信度
score = predictions[node_id]
print('%s (score = %.5f)' % (human_string, score))
print()

注意改下里面的模型.pb .txt和测试图片image的路径到你本地位置。然后就是见证奇迹的时刻:


试用Inception结果

从待检测视频中剪出样本用于训练

直接上代码

1
2
3
4
5
6
7
8
9
10
11
12
13
14
15
16
17
18
19
20
21
22
23
24
25
26
27
28
29
30
31
32
33
34
35
36
37
38
39
40
41
42
43
44
45
46
47
48
49
50
51
52
53
54
55
56
57
58
59
60
61
62
63
64
65
66
67
68
import os
import cv2
global frame
global c, folder
global point1, point2
import tkinter as tk
from tkinter import filedialog

def on_mouse(event, x, y, flags, param):
global c
global folder
global frame, point1, point2
img2 = frame.copy()
if event == cv2.EVENT_LBUTTONDOWN: #左键点击
point1 = (x,y)
cv2.circle(img2, point1, 10, (0,255,0), 5)
cv2.imshow('image', img2)
elif event == cv2.EVENT_MOUSEMOVE and (flags & cv2.EVENT_FLAG_LBUTTON): #按住左键拖曳
cv2.rectangle(img2, point1, (x,y), (255,0,0), 5) # 图像,矩形顶点,相对顶点,颜色,粗细
cv2.imshow('image', img2)
elif event == cv2.EVENT_LBUTTONUP: #左键释放
point2 = (x,y)
cv2.rectangle(img2, point1, point2, (0,0,255), 5)
cv2.imshow('image', img2)
min_x = min(point1[0], point2[0])
min_y = min(point1[1], point2[1])
width = abs(point1[0] - point2[0])
height = abs(point1[1] -point2[1])
cut_img = frame[min_y:min_y+height, min_x:min_x+width]
cv2.imwrite(folder+str(c)+'.jpg',cut_img) # 预处理后图像保存位置
print(c)

def main(file_path):
global c
c=0
global frame
global folder
folder = os.getcwd() + '\\toSave\\'
print(folder)
if not os.path.exists(folder):
os.makedirs(folder)

vc=cv2.VideoCapture(file_path)
if vc.isOpened():
rval,frame=vc.read()
else:
rval=False
while rval:
if c%2==0: #设置放慢播放速度,方便我截图
rval,frame=vc.read()
cv2.namedWindow('image')
cv2.setMouseCallback('image', on_mouse) # 调用回调函数
cv2.imshow('image', frame)
# cv2.imwrite('e:/Git/test/'+str(c)+'.jpg',frame)
c=c+1
cv2.waitKey(1)
if cv2.waitKey(25) & 0xFF == ord('q'):
break
vc.release()
cv2.destroyAllWindows()

if __name__ == '__main__':
print("请打开视频文件") #点击视频,会自动播放,用鼠标款选就好,存图到tosave文件夹
root = tk.Tk()
root.withdraw()
file_path = filedialog.askopenfilename()
print(file_path)
main(file_path)

如果纯手工裁剪图片不知道要猴年马月,用脚本后,正样本(含有检测目标人的)剪出500张花了大概两小时不到,因为开始代码没完善好….
负样本的话,如果人少,简直不要太快,十几分钟裁好五百多张。

训练分类

只放入正样本

一开始,没有制作负样本,就纯拿正样本放入之前的五个分类所在的文件夹,新建分类mypassengers,里面放入我的正样本图片,然后重新点击批处理文件训练,结束后进行测试,当然结果会很好。对含有样本图片和其他图片如吉他这种的区分明显,样本图片预测置信度在0.95以上。可能你会觉得可以直接用滑动窗口往网络里面塞图片进行测试了,但是当我把视频里面不含有人的部分也放到里面的时候,会发现是这样的:

额…忘记截图了,反正就是如果不把视频中不含有人的部分也放进去训练,模型也会认为它是目标,然后就没有做区分,这是相当于训练的时候并没有告诉模型需要对公交车内的人和其他物件如窗户椅子做出区分,所以需要制作负样本同样放进去一起训练。

多建一个分类放负样本

嘣~结果非常好,暂时就先不贴图了,后面再更,包括引入滑动窗口对整张图片做识别。

………………………..

好了,2019年5月13日下午,我又回来了。像我之前所说,同时截出正负样本进行训练,然后用滑动窗口复制出许许多多的测试图放入网络中测试。

滑动窗口对视频截图检测客流

滑动窗口


img


> 图为:滑窗法的物体检测流程图

可以发现滑窗的原理和实现都不难,比较关键的一步是需要非极大抑制,直接贴网上找来用的代码如下,helper.py给后面的主程序调用

1
2
3
4
5
6
7
8
9
10
11
12
13
14
15
16
17
18
19
20
21
22
23
24
25
26
27
28
29
30
31
32
33
34
35
36
37
38
39
40
41
42
43
44
45
46
47
48
49
50
51
# -*- coding: utf-8 -*-
"""
Created on Fri May 10 13:43:36 2019

@author: Allent_Computer
"""

# import the necessary packages
import imutils
from skimage.transform import pyramid_gaussian
import cv2

def pyramid(image, scale=1.5, minSize=(70, 70)):
# yield the original image
yield image
loop=1
# keep looping over the pyramid
while loop:
loop-=1
# compute the new dimensions of the image and resize it
w = int(image.shape[1] / scale)
image = imutils.resize(image, width=w)

# if the resized image does not meet the supplied minimum
# size, then stop constructing the pyramid
if image.shape[0] < minSize[1] or image.shape[1] < minSize[0]:
break

# yield the next image in the pyramid
yield image

def sliding_window(image, stepSize, windowSize):
# slide a window across the image
for y in range(0, image.shape[0], stepSize):
for x in range(0, image.shape[1], stepSize):
# yield the current window
yield (x, y, image[y:y + windowSize[1], x:x + windowSize[0]])

if __name__ == '__main__':
image = cv2.imread('E:/python/myInceptionProject/detected_image.jpg')
# METHOD #2: Resizing + Gaussian smoothing.
for (i, resized) in enumerate(pyramid_gaussian(image, downscale=3)):
# if the image is too small, break from the loop
if resized.shape[0] < 30 or resized.shape[1] < 30:
break
# show the resized image
WinName = "Layer {}".format(i + 1)
# cv2.imshow(WinName, resized)
# cv2.waitKey(10)
resized = resized*255
cv2.imwrite('./'+WinName+'.jpg',resized)

然后是滑动窗口slideMask.py

1
2
3
4
5
6
7
8
9
10
11
12
13
14
15
16
17
18
19
20
21
22
23
24
25
26
27
28
29
30
31
32
33
34
35
36
37
38
39
40
41
42
43
44
45
# -*- coding: utf-8 -*-
"""
Created on Fri May 10 10:55:08 2019

@author: Allent_Computer
"""
# import the necessary packages
import helpers
import argparse
import time
import cv2


# load the image and define the window width and height
image = cv2.imread('E:/python/myInceptionProject/detected_image.jpg')
(winW, winH) = (60, 48)

i=1
# loop over the image pyramid
for resized in helpers.pyramid(image, scale=1.5):
# loop over the sliding window for each layer of the pyramid
for (x, y, window) in helpers.sliding_window(resized, stepSize=16, windowSize=(winW, winH)):
# if the window does not meet our desired window size, ignore it
if window.shape[0] != winH or window.shape[1] != winW:
continue

# THIS IS WHERE YOU WOULD PROCESS YOUR WINDOW, SUCH AS APPLYING A
# MACHINE LEARNING CLASSIFIER TO CLASSIFY THE CONTENTS OF THE
# WINDOW

# since we do not have a classifier, we'll just draw the window
clone = resized.copy()
# cv2.rectangle(clone, (x, y), (x + winW, y + winH), (0, 255, 0), 2)
cut_img=clone[y:y + winH,x:x+winH]
cv2.imwrite("E:/python/myInceptionProject/cut_img/"+str(i)+'.jpg',cut_img)
i+=1
# print(img)
# cv2.rectangle(clone, (x, y), (x + winW, y + winH), (0, 255, 0), 2)
# cv2.imshow("Window", clone)
# cv2.waitKey(1)
# k = cv2.waitKey(0) # waitkey代表读取键盘的输入,括号里的数字代表等待多长时间,单位ms。 0代表一直等待
# if k ==27: # 键盘上Esc键的键值
# cv2.destroyAllWindows()
# continue
# time.sleep(0.025)

源码是在网上找的然后手动修改。

非极大值抑制并检测乘客

如果不加入极大值抑制,后面检测后的结果就很难看。极大值抑制函数如下,boxs是存放窗口box的list,box也是list,里面是窗口的左上角位置x和y以及该窗口的得分(预测置信度)。

1
2
3
4
5
6
7
8
9
10
11
12
13
14
15
16
17
18
19
20
21
22
23
24
25
26
27
28
29
30
31
32
33
34
35
36
37
38
39
40
41
42
43
def py_nms(boxs, thresh=0.9, mode="Union"):
"""
greedily select boxes with high confidence
keep boxes overlap <= thresh
rule out overlap > thresh
:param dets: [[x1, y1, x2, y2 score]]
:param thresh: retain overlap <= thresh
:return: indexes to keep
"""
dets=np.array(boxs)
if len(dets) == 0:
return []
x1 = dets[:, 0]
y1 = dets[:, 1]
scores = dets[:, 2]
x2 = x1+winW
y2 = y1+winW


areas = (x2 - x1 + 1) * (y2 - y1 + 1)
order = scores.argsort()[::-1]

keep = []
while order.size > 0:
i = order[0]
keep.append(i)
xx1 = np.maximum(x1[i], x1[order[1:]])
yy1 = np.maximum(y1[i], y1[order[1:]])
xx2 = np.minimum(x2[i], x2[order[1:]])
yy2 = np.minimum(y2[i], y2[order[1:]])

w = np.maximum(0.0, xx2 - xx1 + 1)
h = np.maximum(0.0, yy2 - yy1 + 1)
inter = w * h
if mode == "Union":
ovr = inter / (areas[i] + areas[order[1:]] - inter)
elif mode == "Minimum":
ovr = inter / np.minimum(areas[i], areas[order[1:]])

inds = np.where(ovr <= thresh)[0]
order = order[inds + 1]

return dets[keep]

此时,我对之前po出的训练结果测试的代码做了些修改,然后直接读图,整体测试代码如下

1
2
3
4
5
6
7
8
9
10
11
12
13
14
15
16
17
18
19
20
21
22
23
24
25
26
27
28
29
30
31
32
33
34
35
36
37
38
39
40
41
42
43
44
45
46
47
48
49
50
51
52
53
54
55
56
57
58
59
60
61
62
63
64
65
66
67
68
69
70
71
72
73
74
75
76
77
78
79
80
81
82
83
84
85
86
87
88
89
90
91
92
93
94
95
96
97
98
99
100
101
102
103
104
105
106
107
108
109
110
111
112
113
114
115
116
117
118
119
120
121
122
123
124
125
126
127
128
129
130
131
132
133
134
135
136
137
138
# coding: utf-8
import tensorflow as tf
import os
import numpy as np
import re
from PIL import Image
import matplotlib.pyplot as plt
import helpers
import cv2
import imutils

# load the image and define the window width and height
image = cv2.imread('E:/python/myInceptionProject/test_img/ped_sample1900.jpg')
(winW, winH) = (60, 48)

lines = tf.gfile.GFile('retrain/output_labels.txt').readlines()
uid_to_human = {}
k=2

def py_nms(boxs, thresh=0.9, mode="Union"):
"""
greedily select boxes with high confidence
keep boxes overlap <= thresh
rule out overlap > thresh
:param dets: [[x1, y1, x2, y2 score]]
:param thresh: retain overlap <= thresh
:return: indexes to keep
"""
dets=np.array(boxs)
if len(dets) == 0:
return []
x1 = dets[:, 0]
y1 = dets[:, 1]
scores = dets[:, 2]
x2 = x1+winW
y2 = y1+winW


areas = (x2 - x1 + 1) * (y2 - y1 + 1)
order = scores.argsort()[::-1]

keep = []
while order.size > 0:
i = order[0]
keep.append(i)
xx1 = np.maximum(x1[i], x1[order[1:]])
yy1 = np.maximum(y1[i], y1[order[1:]])
xx2 = np.minimum(x2[i], x2[order[1:]])
yy2 = np.minimum(y2[i], y2[order[1:]])

w = np.maximum(0.0, xx2 - xx1 + 1)
h = np.maximum(0.0, yy2 - yy1 + 1)
inter = w * h
if mode == "Union":
ovr = inter / (areas[i] + areas[order[1:]] - inter)
elif mode == "Minimum":
ovr = inter / np.minimum(areas[i], areas[order[1:]])

inds = np.where(ovr <= thresh)[0]
order = order[inds + 1]

return dets[keep]


#一行一行读取数据
for uid,line in enumerate(lines) :
#去掉换行符
line=line.strip('\n')
uid_to_human[uid] = line

def id_to_string(node_id):
if node_id not in uid_to_human:
return ''
return uid_to_human[node_id]

with tf.gfile.FastGFile('retrain/output_graph.pb', 'rb') as f:
graph_def = tf.GraphDef()
graph_def.ParseFromString(f.read())
tf.import_graph_def(graph_def, name='')

with tf.Session() as sess:
softmax_tensor = sess.graph.get_tensor_by_name('final_result:0')
#遍历目录
scale=2.5
w = int(image.shape[1] / scale)
with tf.Session() as sess:
softmax_tensor = sess.graph.get_tensor_by_name('final_result:0')
#遍历目录
for root,dirs,files in os.walk('E:/python/myInceptionProject/test_img/'):
for file in files:
boxs=[]
image=cv2.imread(os.path.join(root,file))
resized = imutils.resize(image, width=w)
#for resized in helpers.pyramid(image, scale=1.5):
# loop over the sliding window for each layer of the pyramid
for (x, y, window) in helpers.sliding_window(resized, stepSize=16, windowSize=(winW, winH)):
# if the window does not meet our desired window size, ignore it
if window.shape[0] != winH or window.shape[1] != winW:
continue
clone = resized.copy()
# cv2.rectangle(clone, (x, y), (x + winW, y + winH), (0, 255, 0), 2)
cut_img=clone[y:y + winH,x:x+winH]
cv2.imwrite("E:/python/myInceptionProject/cut_img/1.jpg",cut_img)
#载入图片
image_data = tf.gfile.FastGFile("E:/python/myInceptionProject/cut_img/1.jpg", 'rb').read()
predictions = sess.run(softmax_tensor,{'DecodeJpeg/contents:0': image_data})#图片格式是jpg格式
predictions = np.squeeze(predictions)#把结果转为1维数据

#排序
top_k = predictions.argsort()[::-1]
if top_k[0]==3 and predictions[top_k[0]]>0.92:
box=[x,y,predictions[top_k[0]]]
boxs.append(box)
# cv2.rectangle(image, (int_x, int_y), (int_x + int_winW, int_y + int_winW), (0, 255, 0), 1)
#打印图片路径及名称
# image_path = os.path.join(root,file)
# print(image_path)
#显示图片
# img=Image.open(image_path)
# plt.imshow(cut_img)
# plt.axis('off')
# plt.show()
# print(top_k)
for node_id in top_k:
#获取分类名称
human_string = id_to_string(node_id)
#获取该分类的置信度
score = predictions[node_id]
print('%s (score = %.5f)' % (human_string, score))
result=py_nms(boxs,thresh=0.3,mode="Union")
for i in range(len(result)):
int_x=int(result[i][0]*scale)
int_y=int(result[i][1]*scale)
int_winW=int(winW*scale)
int_winH=int(winH*scale)
cv2.rectangle(image, (int_x, int_y), (int_x + int_winW, int_y + int_winH), (0, 255, 0), 1)
cv2.imwrite("E:/python/myInceptionProject/cut_img/"+str(k)+".jpg",image)
k+=1

检测图片是类似这种:


source_image


> 图为:视频某一帧,效果见目录位置

当然,像所有论文作者一样,我只是贴出了效果比较明显的图片,其实如果不加入非极大值抑制,会得到如下结果


4


> 图为:不加非极大值抑制

会有很多检测结果并不好,像下面图片,首先检测框款选的位置还是有点偏差,此外寸头男子就没有检测出来,倒是把手给框出来了,这是因为训练时候没有短头发的样本放进去….


7


> 图为:检测效果不明显

此外最最重要的是,Inception V3的网络结构很大,而且并不是专门用于检测人流的网络,它检测客流就明显不具有实时性,基本只能检测几百张图片这样。如果存入太多帧图片到session中,会报错如下:
raise ValueError(“GraphDef cannot be larger than 2GB.”)
ValueError: GraphDef cannot be larger than 2GB.

会话不能加载太多图片,所以只能部分图片部分图片地读到会话中,而不能直接把视频读进去,这样处理虽然也可以得到最后结果,然后整合输出视频,但是实在是太慢。

结论

可以检测出人流,但是效果一般,而且实时性太差,所以转战yolo,想看的请出门走转。