Intro
This blog aims to teach how to deploy a pytorch model in Windows platform. The deployed model in this article has only inference ability for torch::jit does not support back propagation of some layers or operations. Of course, reasoning only is enough for many projects. The tools used for deployment include visual studio,opencv,libtorch。
Environment
win10 platform
cuda10.2+cudnn7.6.5
Gtx 1080Ti
visual studio 2017 community version
opencv 4.5.0
libtorch 1.7
Actually,except that libtorch version must be higher than or equal to pytorch version(for possible api problem) and visual studio must be no less than 2015. Other dependencies have no rigid version requirment. Enven graphics card is not a must if cpu speed is a satisfactory.
visual studio
visual studio download link here, just download it and install c++ parts.
opencv
Official opencv website provides what you want。Download the executable file and unzip it to the desired dir.
libtorch
Down load the libtorch 1.7x release.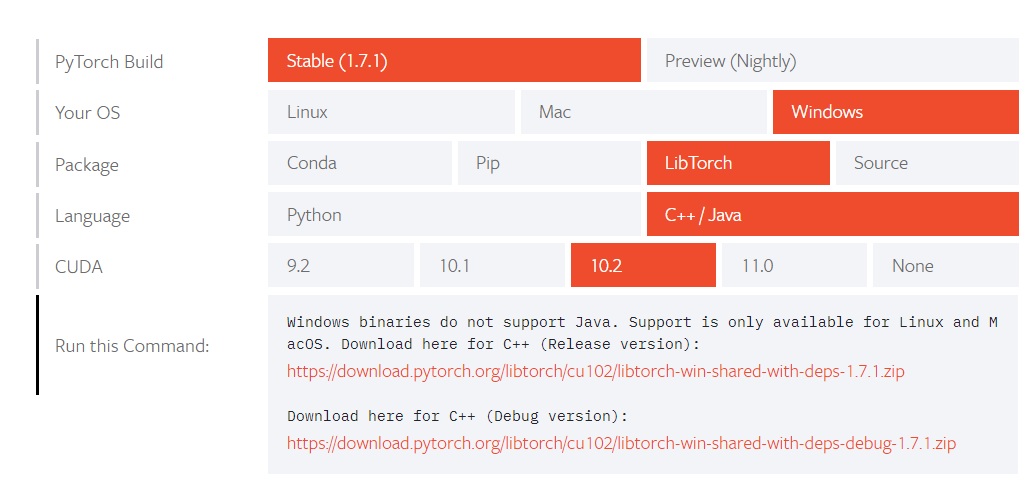
Then unzip the file to destination just like the following setting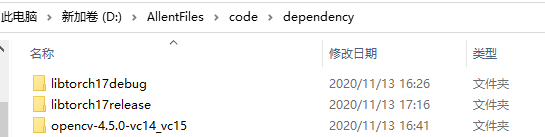
Example
generate .pt file
I chose ResNet34 as an example to show the deployment. Prepare a picture to test if succeeded. The picture in the blog is here:
The generate torchscript file:
1 | from torchvision.models import resnet34 |
the outputs should be a .pt file and:
1 | predicted class: 723th, prob: 0.5916505455970764 |
Visual Studio config
new a Visual Studio project。
Open Visual Studio 2017. Click file->new->project and new a empty c++ project.
Config env
Choose Release mode and x64 platform:
Property
include
Right clike the project and go to property configuration page. Choose VC++ include and add include and lib path.
1 | your path to libtorch\include\torch\csrc\api\include |
Mine is here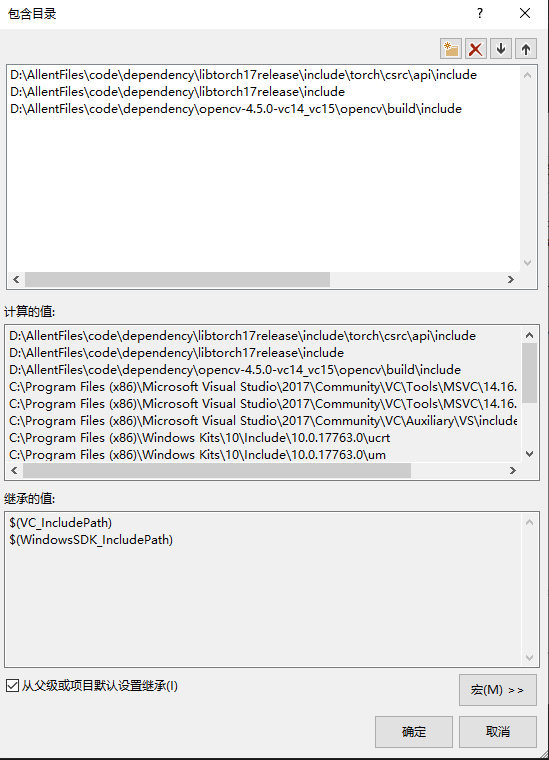
lib
Lib path should be:
1 | your path to libtorch\lib |
The relationships of VC-VS, opencv-vc are here。VS2017 target vc15, opencv’ \build\x64 includes vc14 and vc15. This blog choose vc14. Lib path configuration like follows: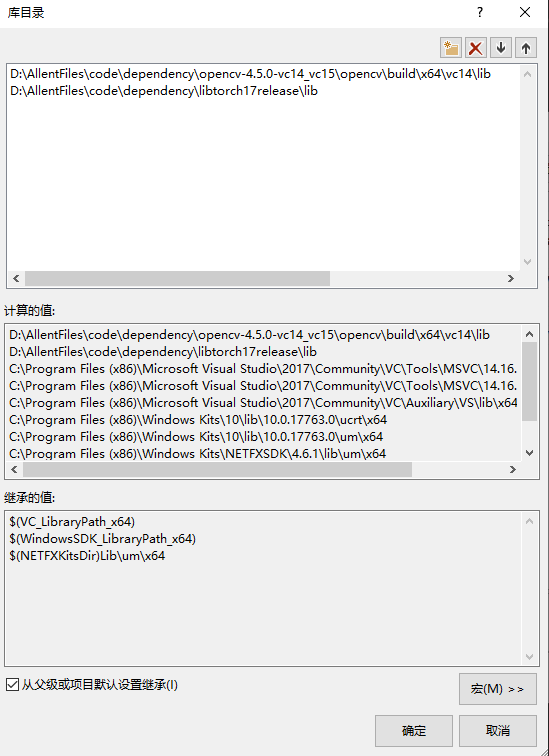
linker
The last is the linker, clik the linker->input->add dependency and add all the .lib file name in libtorch. Besides, don’t forget .lib file name under opencv:
1 | opencv_world450.lib |
dll
Copy all the dll files needed to the excutation path. If you don’t know which dll is needed, just run the code. Then the windows will remind you….
cpp code
1 |
|
编译执行,代码的输出结果为:
1 | predicted class: 723 |
You will find that c++ result is a little bit different from python’s which is pretty trival.
Some errors
error1:cannot use GPU
If you have GPU but cannot use it in C++, try add the following content in the linker:
1 | /INCLUDE:?warp_size@cuda@at@@YAHXZ |
error2:error “std”: undefined symbol
clik property page->property config->c/c++->language-> set conformance mode no。
error3:miss dll
If build succeeded but xxxx.dll missing when running the code, just paste the dll aside .exe file.